How to Set up Gmail Templates
In the case that you have to write various same emails and send them to a lot of Gmail accounts, you should know how to set up Gmail templates.
Sometimes you feel that you are overloaded with enormous emails and find it hard to manage or solve all of them quickly. In the case that you have to write various same emails and send them to a lot of Gmail accounts, you should know how to set up Gmail templates to save more time with some easy steps.
It is more useful when you share this article or this tip with other members of your team as it shortens the time you unify the communications with clients, partners, and providers.
HOW TO SET UP GMAIL TEMPLATES
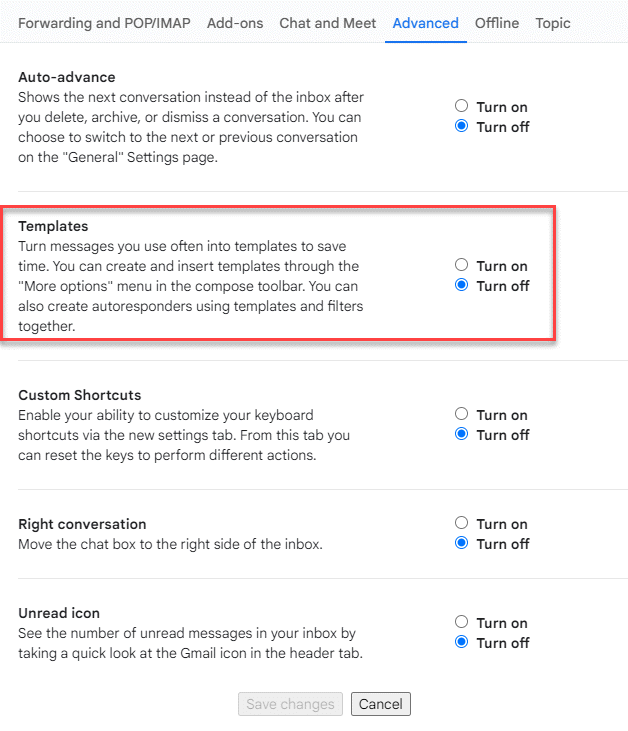
Firstly, you need to enable the templates on Gmail setting
1. Click the gear that says "Settings" in the Gmail toolbar. It's right below your picture.
2. Choose the settings.
3. Go to the tab for "Advanced" (this used to be called Labs).
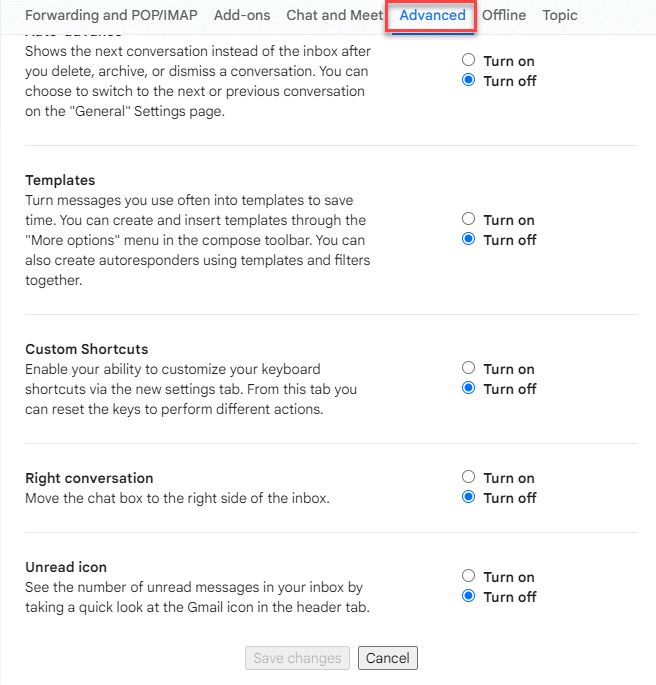
4. Click Turn on in Temple zone and then Save changes
Secondly, Creat Templates
1. You can see the “Compose” button, click and the new message window will appear
Start typing your email template, and when you're done, click on the three dots in the bottom-right corner of the compose window.
2. Click “Sample” and then choose :“Save draft as template.”
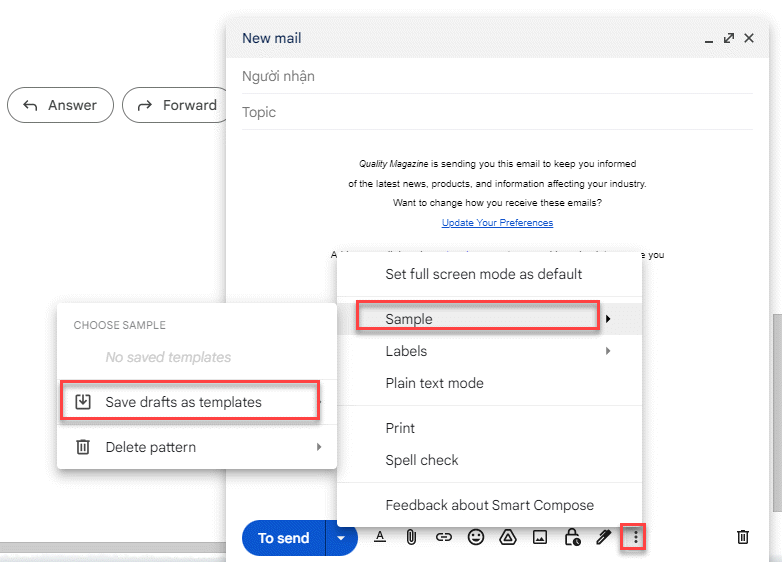
3. Chose the option “Save as new template.”
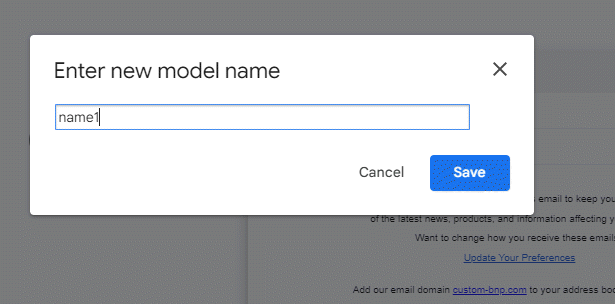
4. Type the name of the new temple and save
HOW TO SEND EMAIL TEMPLATES
1. Click Compose and them write a new email
2. Click the three dots button in the right corner on the bottom
3. Choose “Sample”
4. Choose the temple as you want to use and send
HOW TO EDIT AN EMAIL TEMPLATE IN GMAIL
1. Click Compose on the top left corner,typing message and then click three-dots button.
2. In the insert setion, choose the template that you wat to modify ans import to the new email
3. Change as you want
4. Choose More options then Template and choose the templed yopu change then Save
5. In the Confirm overwrite canned response dialog box, select Save.