Schedule Emails to Send
Sometimes, you need to schedule emails to be sent later in Gmail in order to manage and solve all tasks conveniently and quickly.
Unexpectedly, Gmail's email scheduling feature didn't go live until 2019. Even so, it's a helpful feature that spares you the hassle of installing any add-on software to perform the same function. This article will demonstrate how to schedule an email in Gmail using both the desktop and mobile user interfaces.
Schedule Emails to Send Later
Choose Schedule send by clicking the arrow to the right of the Send button in the email field where you compose, reply, or forward emails.
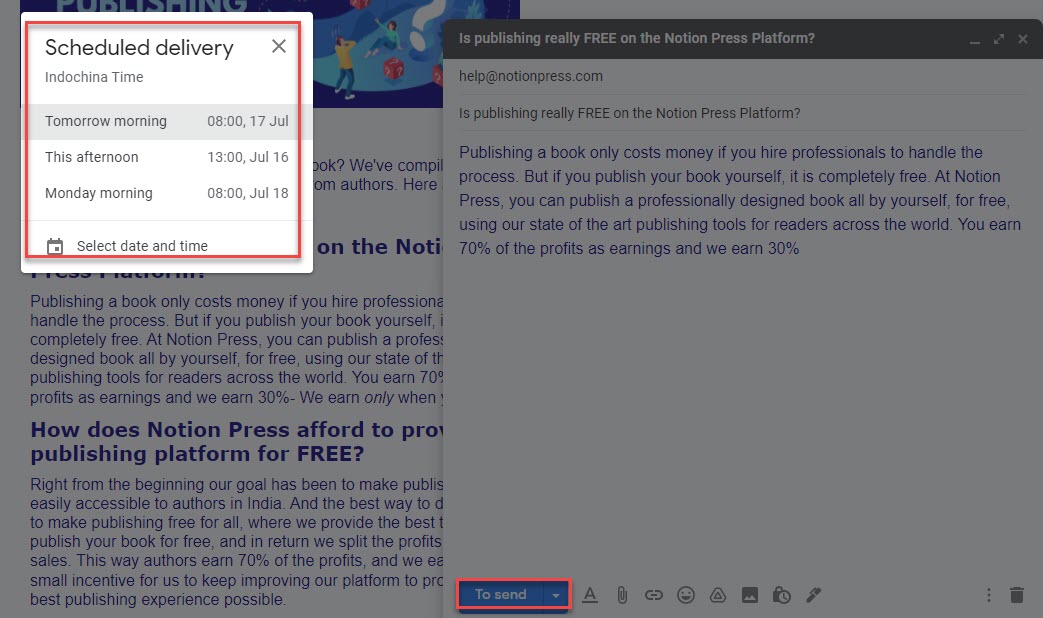
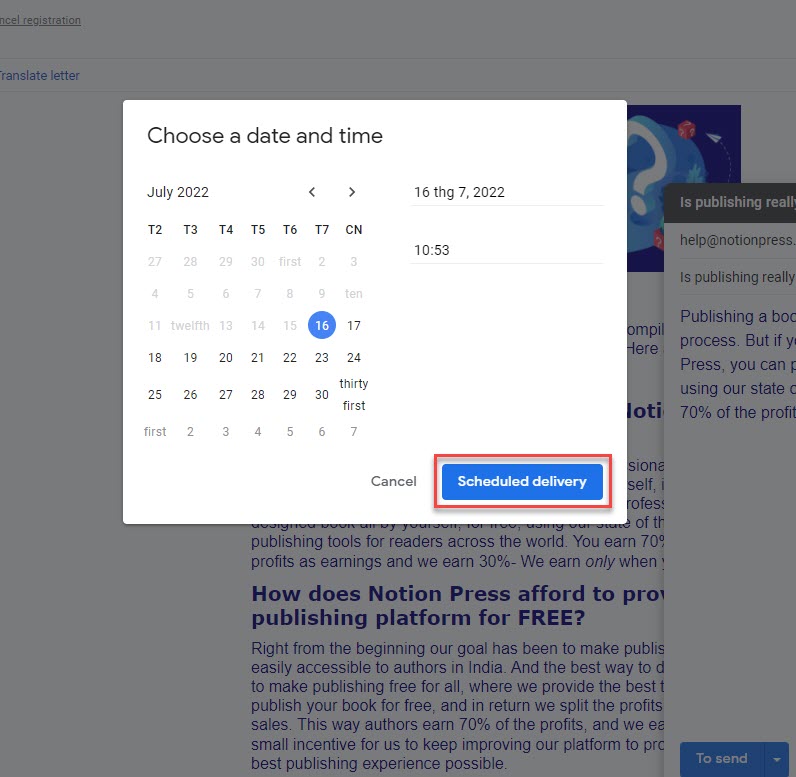
A pop-up window will appear, offering you a selection of dates and times, such as tomorrow morning, tomorrow afternoon, or Monday morning. Select one of these options, and the email will be sent on that day and at that hour. You can also pick the precise day and hour that you desire. Select Pick date & time in the pop-up box.
To choose a date, use the calendar or type it into the corresponding field in the top right. Then, enter the time in that field. Click Schedule send when you finish.
Create a new message, choose an existing one to respond to, or forward.
Select Schedule send by tapping the three dots in the top right corner of the email.
Choose one of the predetermined hours and dates, such as Monday morning, Monday afternoon, or Tomorrow morning.
To create a custom schedule, select Pick date & time instead.
Pick a date on the calendar, then tap the time column to select a time.
Tap Save.
View Scheduled Emails
On computer
- Select the Scheduled label, and if necessary, expand the left-hand navigation. On the right, a list of all planned emails with their scheduled delivery dates may be found. Selecting a scheduled message from the list will cancel it.
- Next, select Cancel send from the email's top menu. In Gmail, you can choose not to send a scheduled email.
- A planned email can be accessed in the Drafts folder after it has been cancelled. On the lower left, there will also be a notification informing you of this brief display.
On Gmail App
- In the upper left corner, tap the menu symbol (three lines). Select the Scheduled label next.
- All scheduled emails are shown along with the dates they are expected to be sent.
- Select the scheduled message from the list, then click Cancel send at the email's top to stop sending it.